Updated
Winter storage and maintenance of robotic lawn mowers – how to maximise the life of your mower
What’s the best way to store and maintain your robotic lawn mower over the winter? In this guide you can read all about storage, cleaning, blade replacement and spare parts. Everything to make sure you maximise the life of your robotic lawnmower in the UK.
If you buy a robotic lawn mower that costs hundreds of pounds, you want it to last a long time. Of course, how long a robotic lawn mower lasts is partly a result of the manufacturer’s choice of components. High quality components and a good design obviously last longer than cheap components in a poor design. But the lifetime also depends on how good you are at storing and maintaining your robotic lawn mower.
Robotic lawn mower maintenance aspects
Maintaining a robotic lawn mower can be divided into several different overall aspects:
- Winter storage of the robotic lawn mower
- Cleaning the robotic lawn mower
- Changing the blades on your robotic lawn mower
- Spare parts and repairing your robotic lawn mower
- Occasional repairs to the installation, such as fixing broken cables
In the article below, we’ll address these points one by one.
Winter storage of robotic lawn mowers – how to do it right
When the grass stops growing in late autumn, it’s time to bring your robotic lawn mower in for winter storage. The grass stops growing when the nights become frosty. But you can set the cutting height higher a month or so earlier so the grass is a bit longer when it becomes dormant – this way the grass gets through the winter better than if you have it cut like a golf green.
Winter storage is pretty much the same for all robotic lawn mowers, although the different manufacturers have specific recommendations.
How to store your robotic lawn mower for the winter:
Start by cleaning your robotic lawnmower according to the manufacturer's instructions (see the section at the top of this article for more information about cleaning your robotic lawn mower). This is important in ensuring that it works properly next year too.
Inspect the robotic lawn mower for damage. If you find any, it’s a good idea to fix this over the winter when the robotic lawn mower isn’t in use. Major damage may mean you have to take your robotic lawn mower to an authorised workshop, and with some manufacturers even that it has to be sent to another country for repair. In other words, you can lose your robotic lawn mower for several weeks if you’re unlucky. So it’s better to deal with damage now than wait until spring.
It’s also a good idea to prepare the robotic lawn mower for next season by sharpening/replacing fixed blades, or replacing them with new pivot blades, depending on which model you have. This means your robotic lawn mower is ready to cut your grass efficiently next year.
When your robotic lawn mower is whole and clean, you're ready to store it for the winter. Place your robotic lawn mower in its charging station in a heated area. Connect the charging station so the robotic lawn mower receives maintenance energy until it’s fully charged.
Then completely switch off the robotic lawn mower by pressing the button/switch – you can often find this on the chassis. If you own a Robomow or Cub Cadet, you should also remove the fuse. Wait until it’s fully charged and then you can unplug the charging station from the wall socket. Make sure the robotic lawn mower is stored in a dry and frost-free place.
The only thing left on the lawn should now be the perimeter wire, and of course that should stay where it is. But it may be a good idea to spray contact cleaner on the ends and place them in a waterproof bag to prevent rust.
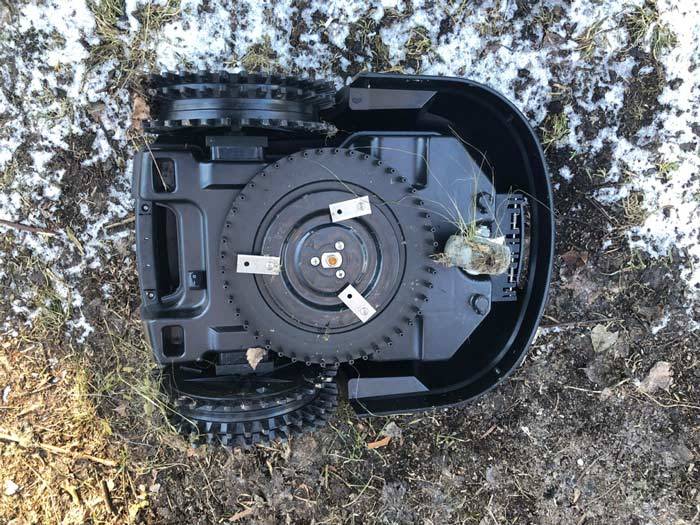
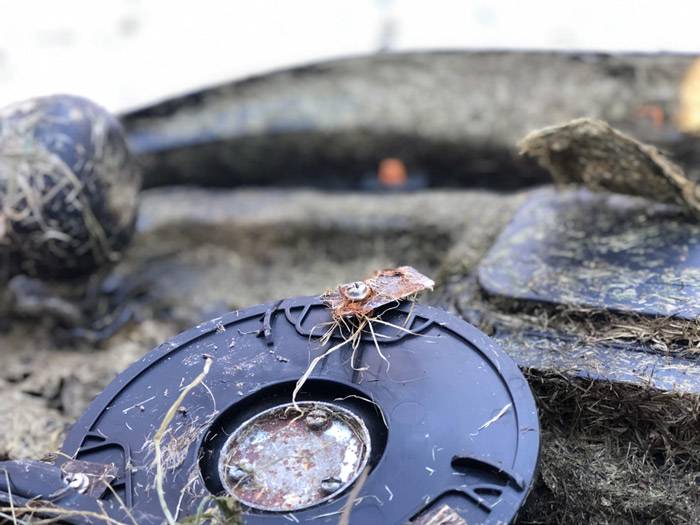
Caption: If you keep your robotic lawn mower clean from grass residue and dirt, it will last longer and be able to mow your grass for its full operating time.
Cleaning a robotic lawn mower – how to do it right
It’s important to keep your robotic lawn mower clean. The noise level gets louder if blade disc is full of grass residue, and it also affects the robotic lawn mower’s terrain-handling and operating time. And because the resistance increases and the blades can’t rotate freely, it also increases the energy consumption. Wheels filled with grass cuttings also have less grip and find it more difficult to handle unevennesses in the lawn and on slopes.
Pollen and dust also collect quickly on the top of the robotic lawn mower, both in the spring and summer. This means you can’t see the display as easily. In other words, a dirty robotic lawn mower provides a poor user experience. So you should make it a habit to check your robotic lawn mower for damage and clean it 2-4 times a month.
How you clean your robotic lawn mower depends on the manufacturer’s recommendations. All robotic lawn mowers can withstand weather and wind, but that rarely means you can rinse them off with a garden hose. The weather resistance of your robotic lawn mower is indicated by its IP class. For example, Honda's top model – the Miimo 3000 – is IPX5 rated and you should therefore be able to rinse it off with the garden hose, while the smaller Honda Miimo 310 model is IPX4 classified so you can’t use the hose on it in the same way.
But it’s common for manufacturers to recommend that you don’t wash your robotic lawn mower with a hose, regardless of its IP classification. Instead, you should clean it with compressed air and a soft brush.
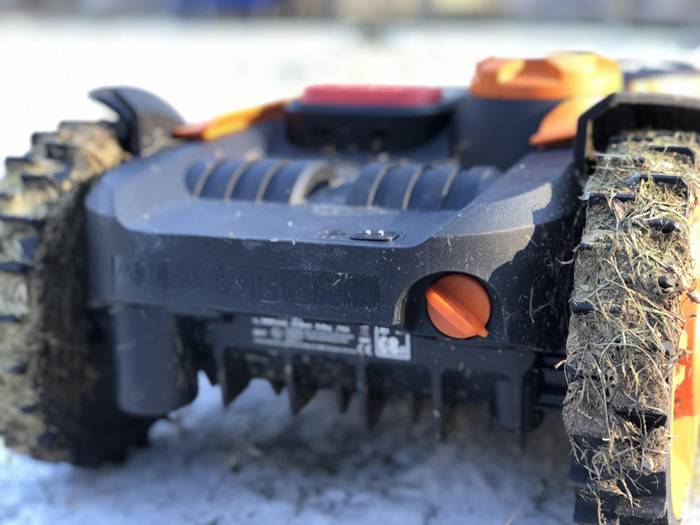
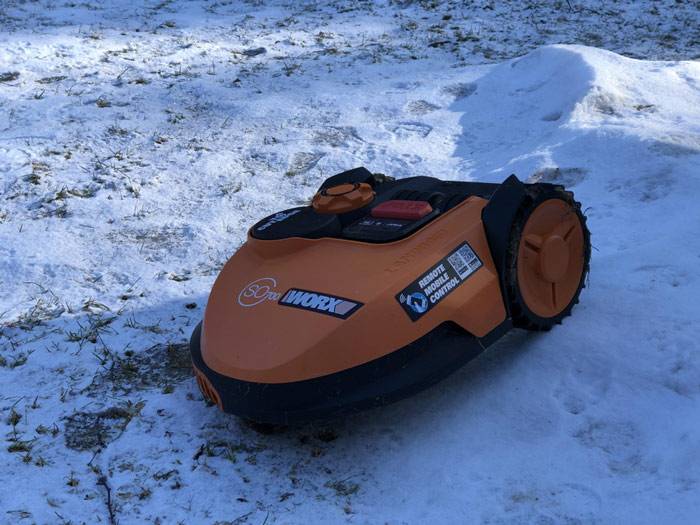
Caption: This is what the power switch on a robotic lawn mower looks like.
How to clean your robotic lawn mower:
Switch off the robotic lawn mower properly – on the power switch if there is one (this is normally on the underside). It’s important that you make sure it can’t start up while you’re cleaning it.
Turn the robotic lawn mower upside down so you can access the underside. Use a soft brush to remove grass residues and other material from the blade disc.
Also brush off dirt and debris from the wheels. Rotate them as you work so the entire wheel is clean when you've finished.
Turn the robotic lawn mower back upright again so you can access the top. You can brush this off with a soft brush too. And if that doesn’t do the trick – for example if it has a lot of pollen and other small particles on it – you can use compressed air or a slightly damp cloth.
You should also clean the docking station with the soft brush. Be careful around charging contacts and moving parts.
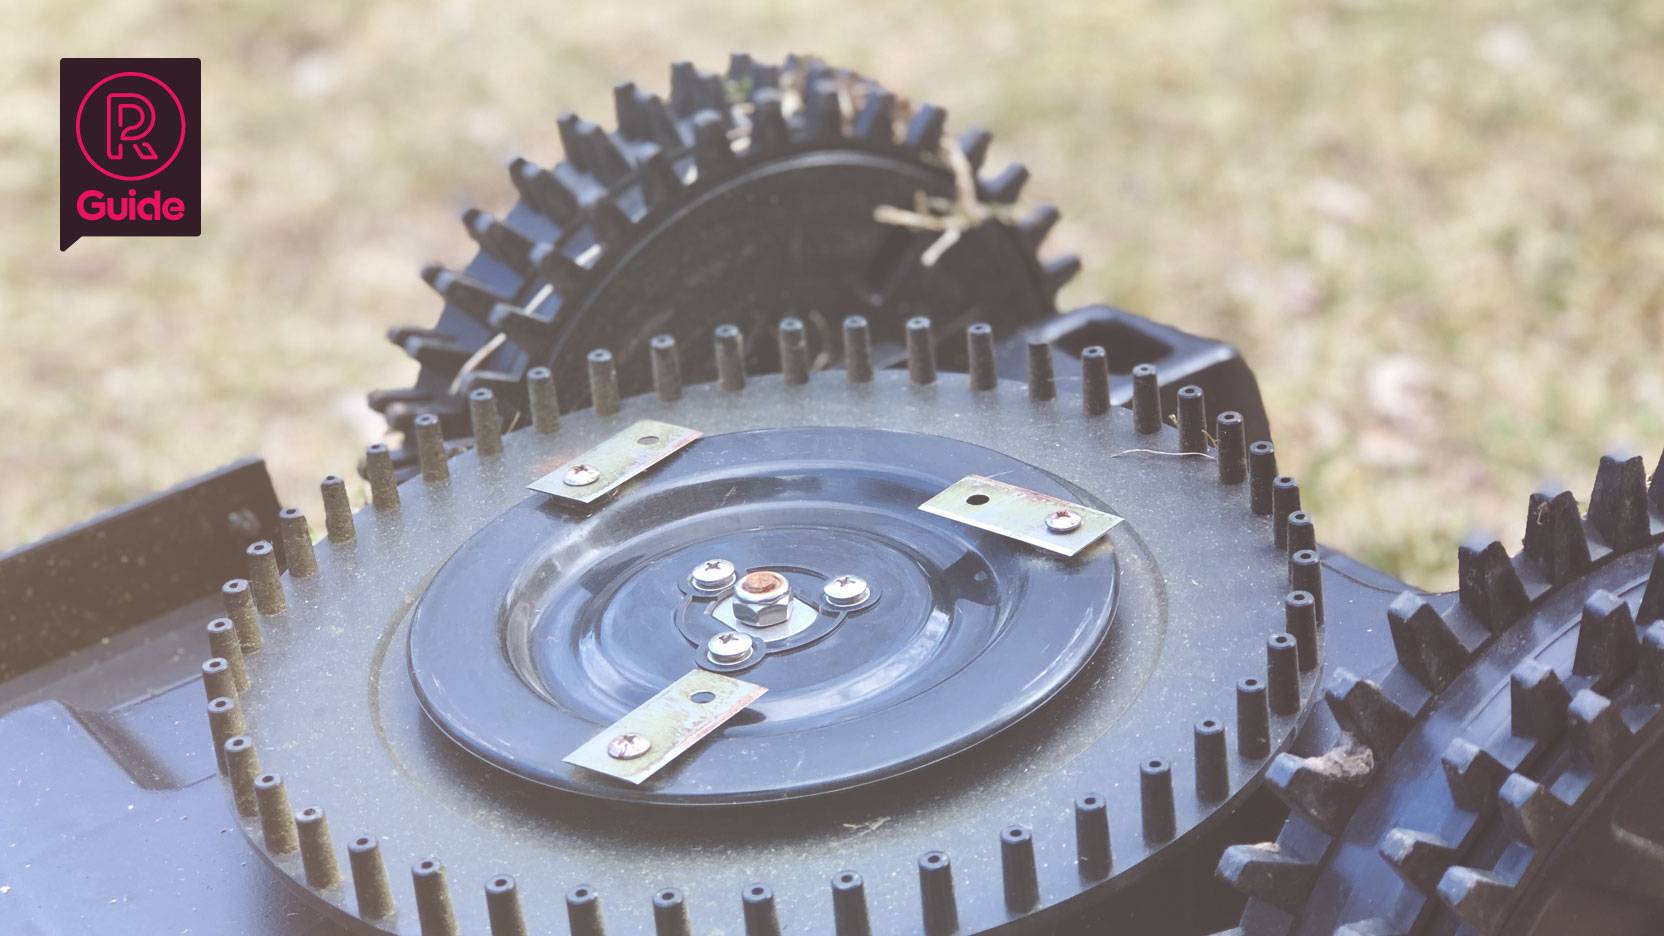
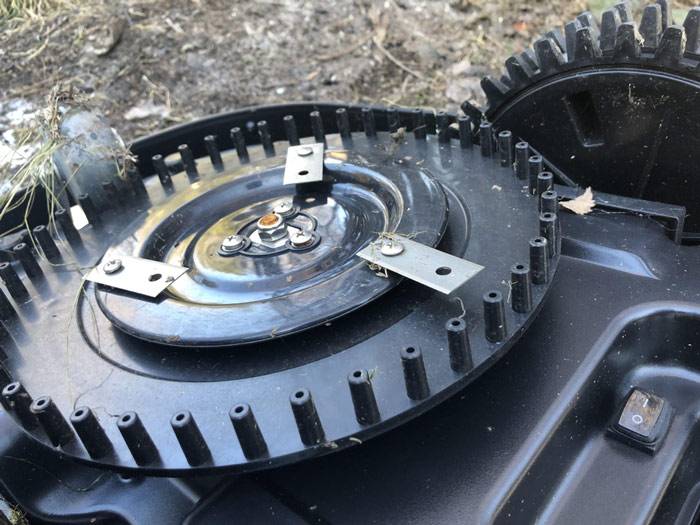
Caption: Here it’s really time to change the blades if this robotic lawn mower is going to continue mowing your lawn efficiently. You should also check the screws and replace any that are starting to get worn.
Replace/sharpen blades
If you don’t replace the blades or sharpen the fixed blade on your robotic lawn mower, it will affect the quality of your lawn. Instead of cutting off the tips of the grass, the blades will knock them off. This means that instead of a fine cut, the ends of the grass strands will be crushed, leading to increased fluid loss. The grass may then develop discoloured tips and become more sensitive to attacks, strong sunlight, drought and so on.
So it’s important that you regularly replace the blades on your robotic lawn mower if it has pivot blades, and that you keep fixed blades nicely sharp or replace them.
The lifetime of the blades is usually indicated in operating hours for the robotic lawnmower, so it depends on how often it’s used (and of course on the terrain type). For example, if the average lifetime of the blades is 200 hours and the robotic lawn mower mows an average of 25 hours a week, the blade will last for approximately 2 months.
How often should you replace the blades on your robotic lawn mower? That depends on the manufacturer's recommendations and how fussy you are about your lawn.
Examples of recommendations:
Husqvarna (pivot blades): States the average life as 4-8 weeks, but that the condition of the grass is the key.
Honda (pivot blades): States the life lifetime as approximately 160 hours, but that the condition of the grass is the key.
Robomow: States the lifetime as 1 season. Otherwise replace as necessary. If it's an RS, you can change the position of the blades halfway through the season.
Stihl/VikingiMow (fixed blades): Has no recommended sharpening interval, but after 200 operating hours your robotic lawnmower will tell you to check the blade status. Stihl recommends that you replace the blade completely instead of sharpening it, as sharpening can affect cutting results and noise levels negatively if done incorrectly.
You may need to replace the blade earlier than the specified lifetime if the terrain is tough. For example, if you see white fibres in your lawn, it’s time to replace the blades.
Checking the blades: Wear work gloves. Switch off the robotic lawn mower properly. Check the blades by lifting the robotic lawn mower so that you can see the underside. If the blades look worn or damaged, it’s time to replace them.
For example, on a pivot blade, you can see if the blade is still perfectly rectangular or if there are variations in the shape.
On stationary blades, the edge should still be sharp and even. Use a vernier caliper to check the thickness and width of the blade and compare it with the original blade.
While you're checking the blades, you should also make sure you can’t see any other damage to your robotic lawn mower. If your mower has a blade disc, check it’s even, that the nuts and screws are intact and that all the parts are securely attached.
How to replace the blades on your robotic lawn mower:
Preparations: Make sure you have work gloves, new blades and the required tools to hand before you start. The tools you need are a spanner to undo blade nuts, and another to hold the knife disc still at the same time. Some manufacturers recommend a torque wrench to re-tighten the nuts, and if you don’t have one, you should buy one or have the blades replaced at an authorised workshop.
Start the process by switching off the robotic lawn mower properly with the fixed power switch (to make sure it can’t start up while you're working on it).
Turn the robotic lawn mower upside down and block the blade disc from moving, for example by holding it in place with a fixed spanner. In some cases, you have to press two lugs together to achieve a locking effect.
After this undo the nut(s) from the blade(s) using the second spanner.
Remove the blade(s) from the bolts and insert new blades.
Check that each nut is undamaged. NB: Some manufacturers recommend that you replace the nut at the same time as you replace the blade.
Attach the blades by tightening the nuts with a spanner (some manufacturers recommend you only use a torque wrench, others a normal open-ended spanner until you reach a clear stop).
Check that the blade(s) can rotate smoothly.
Robotic lawn mowers: Spare parts and guarantees
When you buy a robotic lawn mower, it’s important that you don’t just look at the price. Try to take the brand into account as well, because different brands handle spare parts and guarantees in different ways.
With some manufacturers, the robotic lawn mower has to be sent far away when it needs to be repaired, which means you can lose it for several weeks at a time. And if that happens right in the middle of the grass growing season, it isn’t very much fun. There are also manufacturers that offer authorised workshops all across the country, where you can take the lawn mower yourself and have it repaired on site within a couple of days.
Access to spare parts is also important. Of course, spare parts should be available for several years after you've bought your lawn mower, even after that particular model has been discontinued. Robotic lawnmowers are an unusual product group in the garden range in that most manufacturers release new, upgraded models every year. This isn’t the case when it comes to traditional lawn mowers, power tools and other product groups where every model lasts for several years before a replacement is released. The new robotic lawn mower usually has minor changes, but there are almost always improvements in terms of both hard and software. This means that parts for older robotic lawnmowers can be discontinued.
So find out exactly how long the brand you’re looking at guarantees a supply of spare parts. You should also check the guarantee on the robotic lawn mower you’re planning to buy.
Here are some examples of how robotic lawn mower manufacturers handle spare parts, guarantees and workshops:
Husqvarna Automower: Only sold by authorised dealers who also offer servicing and spare parts. Husqvarna has a large number of dealers all over the country. They state that spare parts are often available for up to 10 years after the model has been discontinued. The guarantee on a robotic lawn mower from Husqvarna is 2 years.
Robomow: The premium models are sold through authorised dealers who also offer servicing and spare parts. You can buy the cheaper product series online. Robomow state that spare parts are often available for up to 10 years after the model has been discontinued. The guarantee on a robotic lawn mower from Robomow is 2 years, and 1 year for the battery.
Honda Miimo: Only sold by authorised dealers who also offer servicing and spare parts. The guarantee on a robotic lawn mower from Honda is 2 years.
Stihl/Viking iMow: Only sold by authorised dealers who also offer servicing and spare parts. How long they offer spare parts can vary, but Stihl states that 10 years is rarely a problem. The guarantee on a robotic lawn mower from Stihl/Viking is 2 years.
How do I find a cable break?
The robotic lawn mower's perimeter wire looks after itself once you have it in place, so it’s easy to forget where it is. So if you dig a new flower bed, move a paved area or use a weed-puller, it’s easy to damage the cable. For example, if you put the spade or weed-puller straight through the cable, it’ll probably break.
If the cable breaks, the circuit breaks, the charging station issues an alert and the robotic lawn mower stops mowing the grass immediately. There's normally an LED on the charging station that starts flashing in a certain colour and with a certain interval if there’s a cable break. The robotic lawn mower display shows what the signal means – in this case a cable break. If you have an app for your robotic lawn mower, you may get the information there too, or it may simply say that the robotic lawn mower doesn’t have a signal.
What do you do if there’s a cable break? Here’s the procedure, step by step:
1. Find the cable break:
There are several ways to find a cable break along a robotic lawn mower’s perimeter wire. There are special tools you can use. There are also tricks you can use if you don’t want to buy such a tool (they're quite expensive). First, check if your robotic lawn mower has a built-in cable break detection function (for example, the iMow has one). If so, use that.
a. Use a special cable break detector.
You can buy a cable break detector in shops from about £30. To use these, you usually have to undo the cable from one connection on the charging station and attach one end of the detector cable to this and the other to the detector.
You also connect a cable between the detector and a conductor that you insert into the lawn (this is the earth conductor). Then you use a receiver that you set to the same frequency as the cable break detector, and when you travel along the perimeter wire, you hear a beeping noise as long as the cable is undamaged. When you get no beeping noise, you’re close to the cable break and can locate it. Remember to disconnect the guide cable before you start, if you own a Husqvarna.
b. Use AM radio.
Some people use a normal AM radio to find a cable break. You disconnect one end of the perimeter wire from the charging station (and any guide cables if your lawn mower is a Husqvarna model), leaving the other end of the wire in the station. Then you start the AM radio, place it close to the connected end and try to find the right frequency (it sounds like a pulsating transmission). When you've found the right frequency, simply walk along the cable until you notice you’re losing the signal with increasing noise in the transmission.
c. Use your eyes.
Usually, when a cable is broken, it's because you – or someone else – have been digging in the garden and have accidentally broken the cable. Alternatively, the cable has been exposed and the robotic lawnmower has carried it along so it’s come up out of the ground and the blades have cut it. In both such cases, traces of the cable break are usually visible. For example, a spade standing upright in the soil, a new installation in the garden (e.g. a greenhouse, swing or similar) or a robotic lawn mower stopped on the lawn. By analysing the surroundings, you can usually find indications near where the cable has broken and then you can simply follow the cable to the break.
2. Expose the cable:
Once you’ve identified the location of the cable break, you should dig up a 20-30 cm section of cable on each side of it to make working easier.
Repair the cable break:
Now you need to repair the perimeter wire, and to do this you normally need two moisture-tight connectors and a bit of spare cable of the right length (probably 10-20 cm). Remember that every joint in the cable degrades the signal a little more. If it’s possible to repair the cable without creating two joints – in other words if the two cable ends reach each other so there’s only one joint – that’s a better option.
a. To make sure there are no more faults, first simply strip the ends of the cables and twist the ends of the loose cable together with the ends of the cable break to make the perimeter wire complete. Check the LED on the charging station to see whether this solves the problem. It can take a couple of seconds – sometimes up to a minute – before the station reacts. You can also check it by starting the robotic lawn mower and seeing whether it starts mowing.
b. If there are more faults, it’s a good idea to locate them before fixing the cable so you know how many connectors and spare bits of cable you need. Then repeat steps 1-3. If you’ve definitely found the fault, you repair the cable by inserting one broken end of the perimeter wire into one hole on the connector and then the end of the spare cable into the other hole. Pinch the connector shut with pliers.
Now you can cut the length of the spare cable by checking how much you need to reach the other end of the broken perimeter wire. Add 2-3 cm so you can bury the joint later. Do the same with the other connector on the other end of the spare cable and the other broken end of the perimeter wire, so you end up with a complete perimeter wire again.
3. Restore the soil:
With all the cable breaks fixed, it’s time to check that the robotic lawn mower works again. If it does, you can restore the soil. Secure visible cable with plastic staples so it’s flat on the ground. Ideally, you should dig a small groove 3-5 cm deep where the joint is. Try to dig up a single turf of grass so it’s not obvious you've been digging there. Insert the joint in the hole and replace the turf back over like a lid.
Now you've repaired the cable break and can restart your robotic lawn mower again. One tip for future installations is to add a bit of extra cable at regular intervals when you're laying it so you avoid having to do double joints for future cable breaks. It’s easiest to add a loop of cable around every fourth staple so it can be stretched out and reach the other end just in case the cable breaks.